Zion National Park

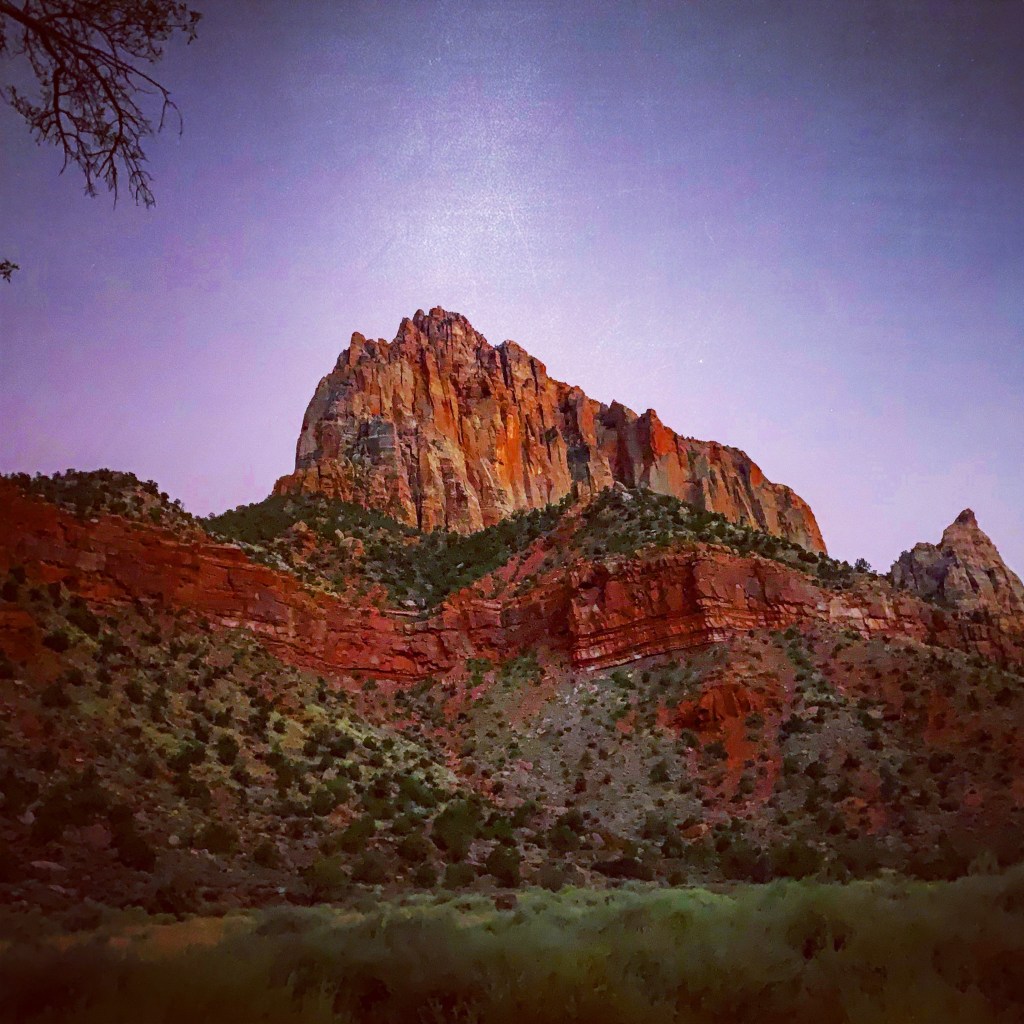
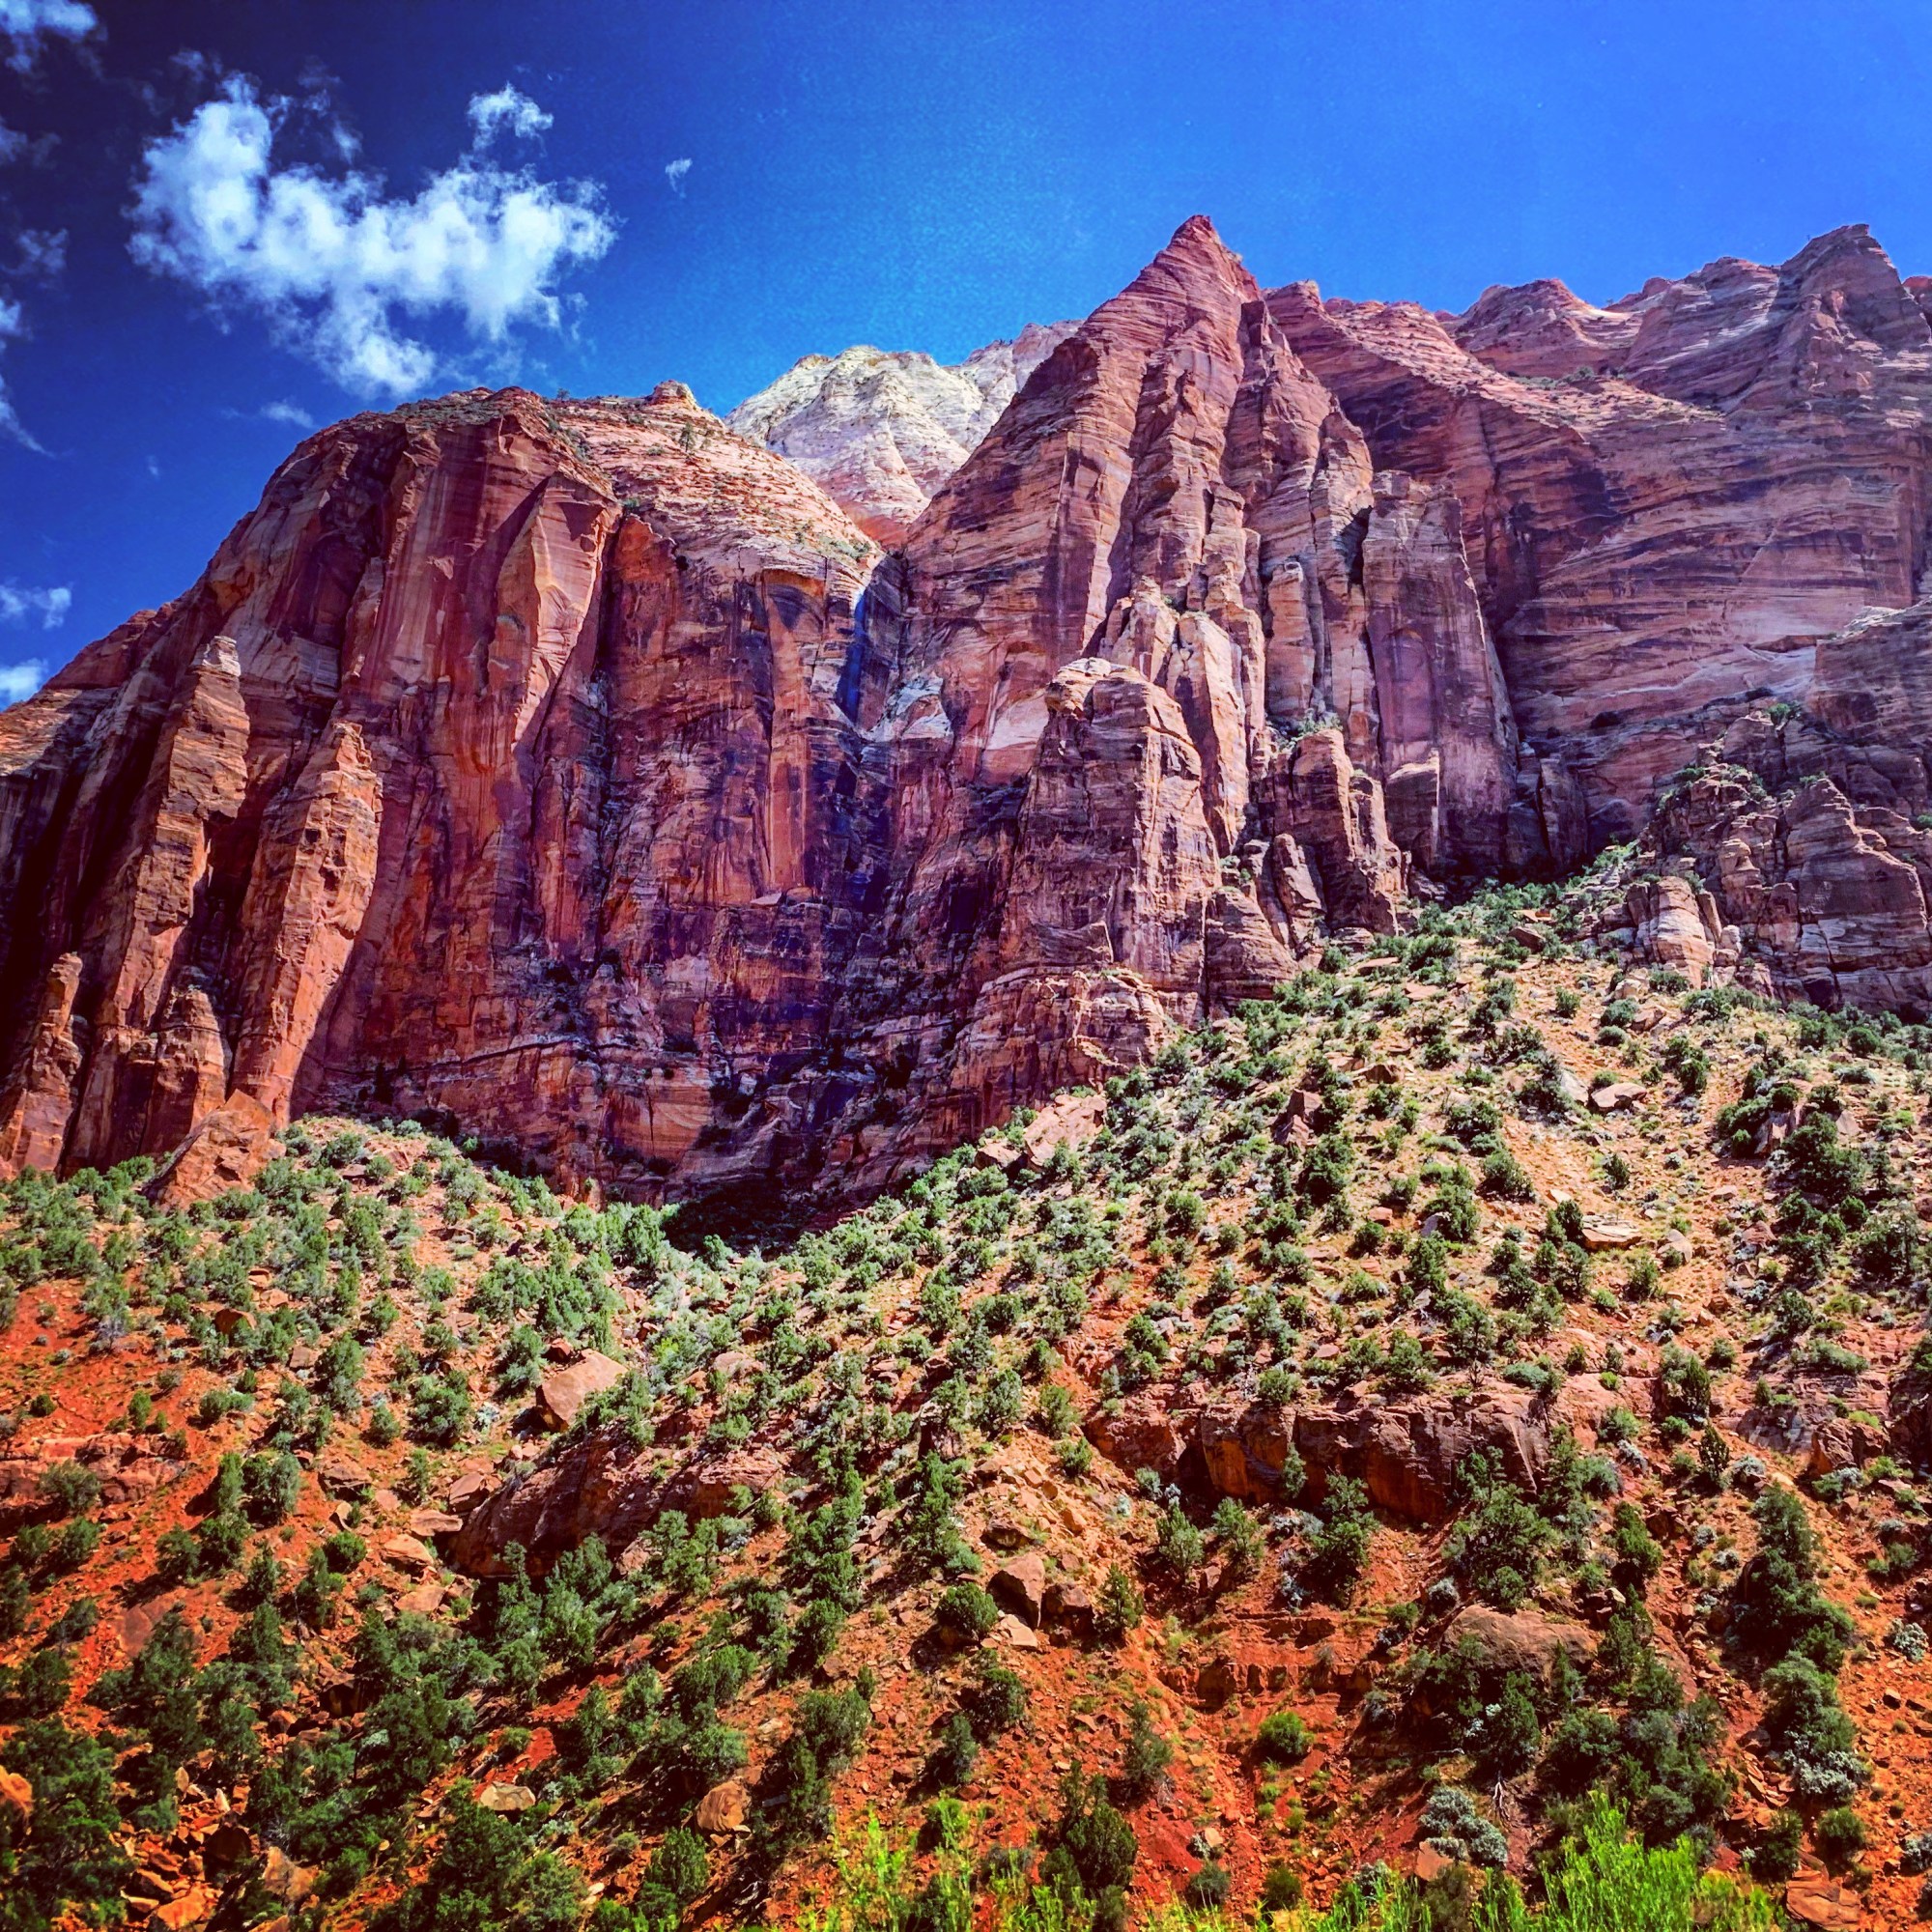
Zion National Park has quickly become one of the most popular national parks in the country. Although almost all national parks have seen an increase in attendance over the past decade, Zion’s location (just 160 miles from Las Vegas) and beautiful geography has rocketed it to the fourth most visited park in 2018. With over 4 million visitors a year, the park can feel very crowded, especially in the summer months. However, with some planning you can still have an amazing experience!

Hiking the Narrows

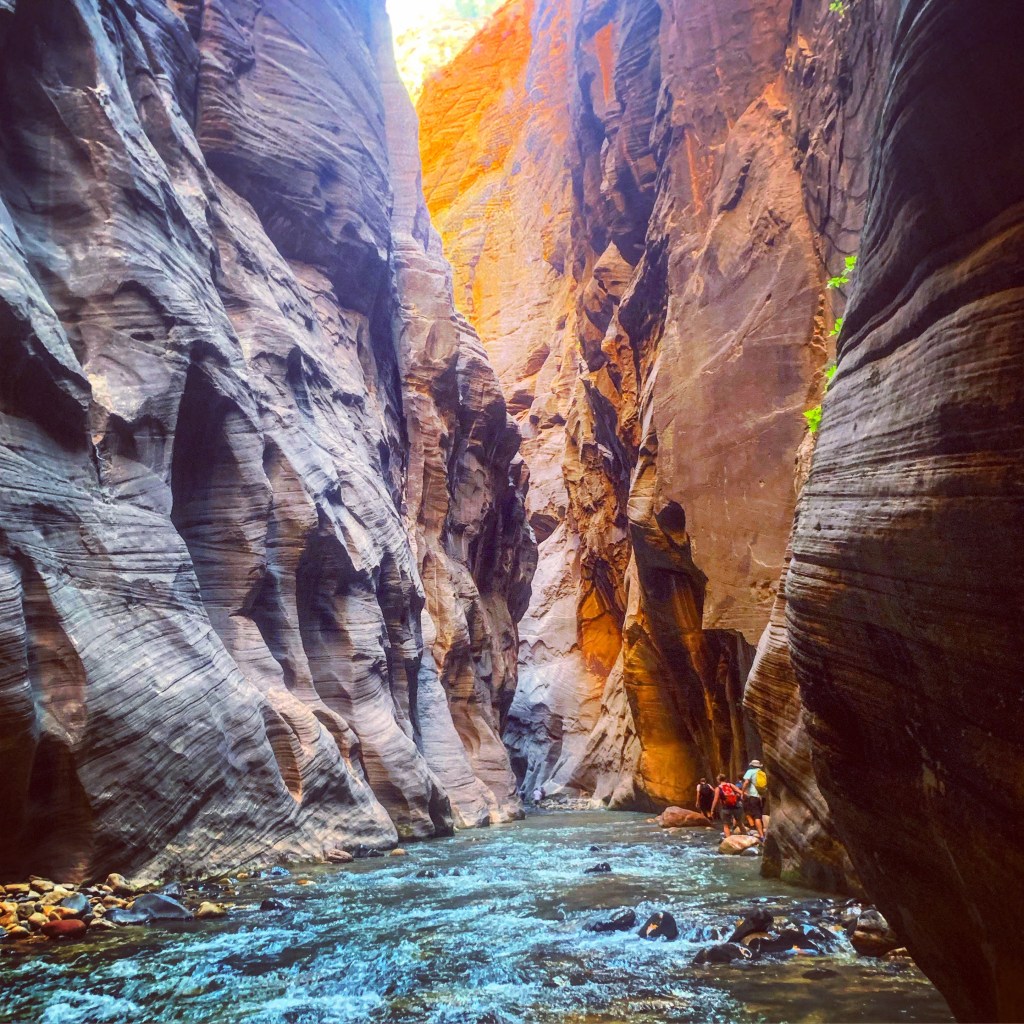
There was really just one thing our family HAD to do in Zion, and that was to hike the Narrows. The Virgin River flows through Zion Canyon, creating a beautiful gorge with thousand foot walls. The narrowest part of this gorge has been aptly named The Narrows, and it is one of the most popular locations in the park. This hike is unique because the river is the trail. Hikers must enter the river and wade over slippery rocks through flowing water to experience the beautiful views in the canyon. With the right equipment and preparation it can be an unforgettable experience! Here are our tips for a successful hike in the Narrows.

#1: Rent equipment

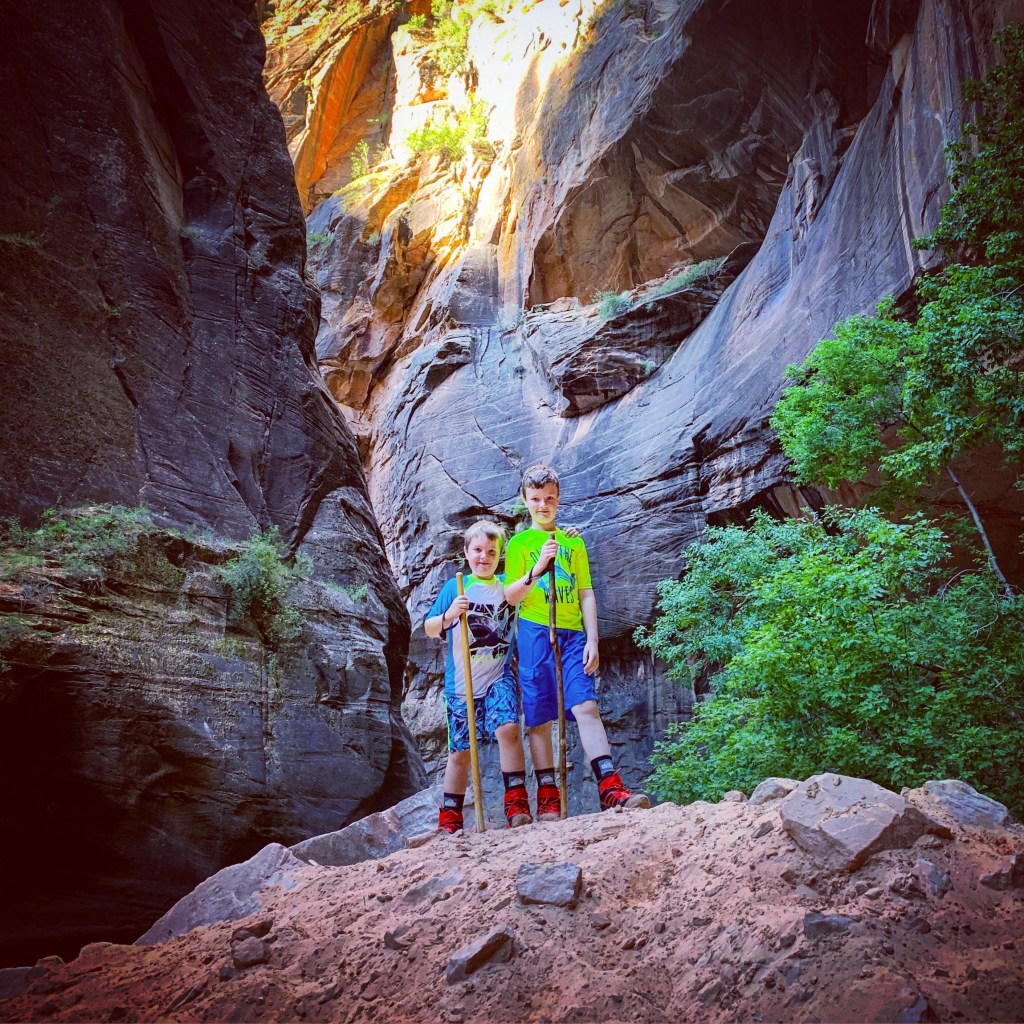
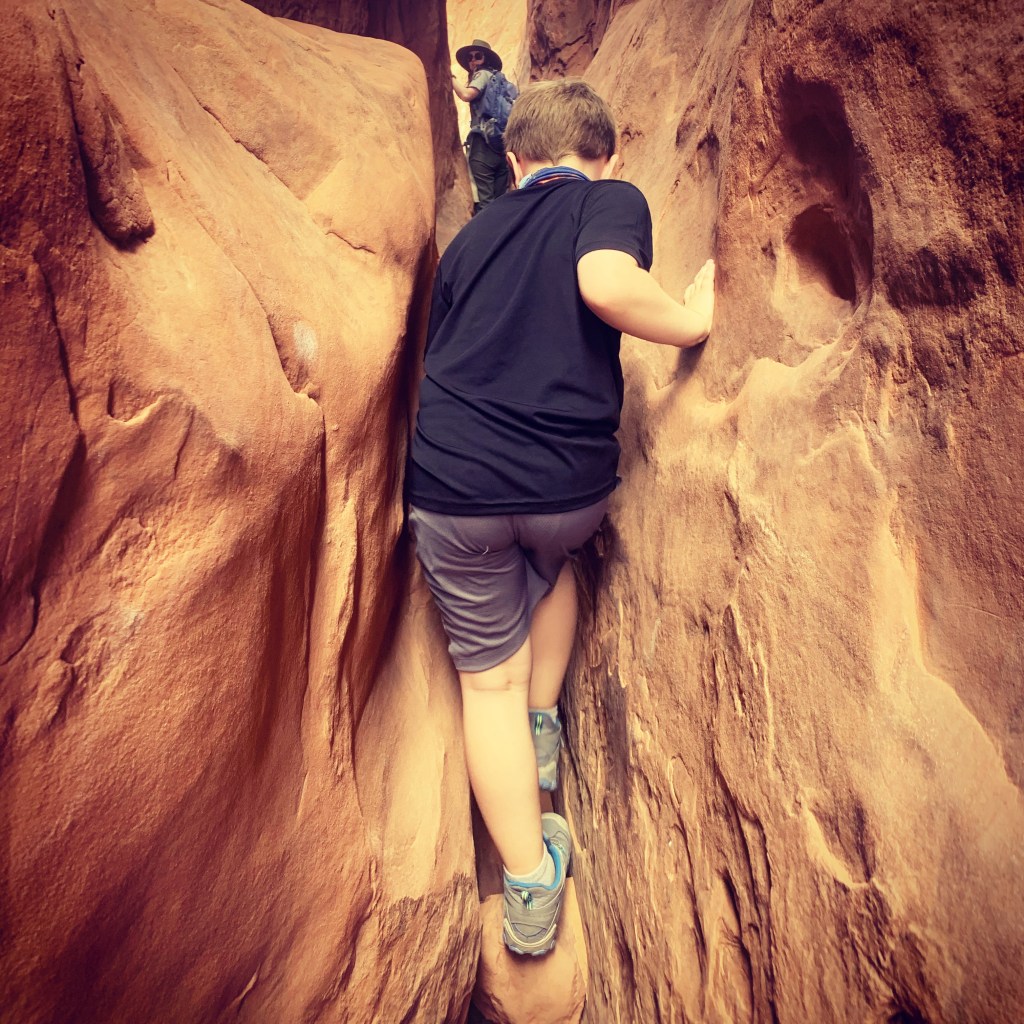
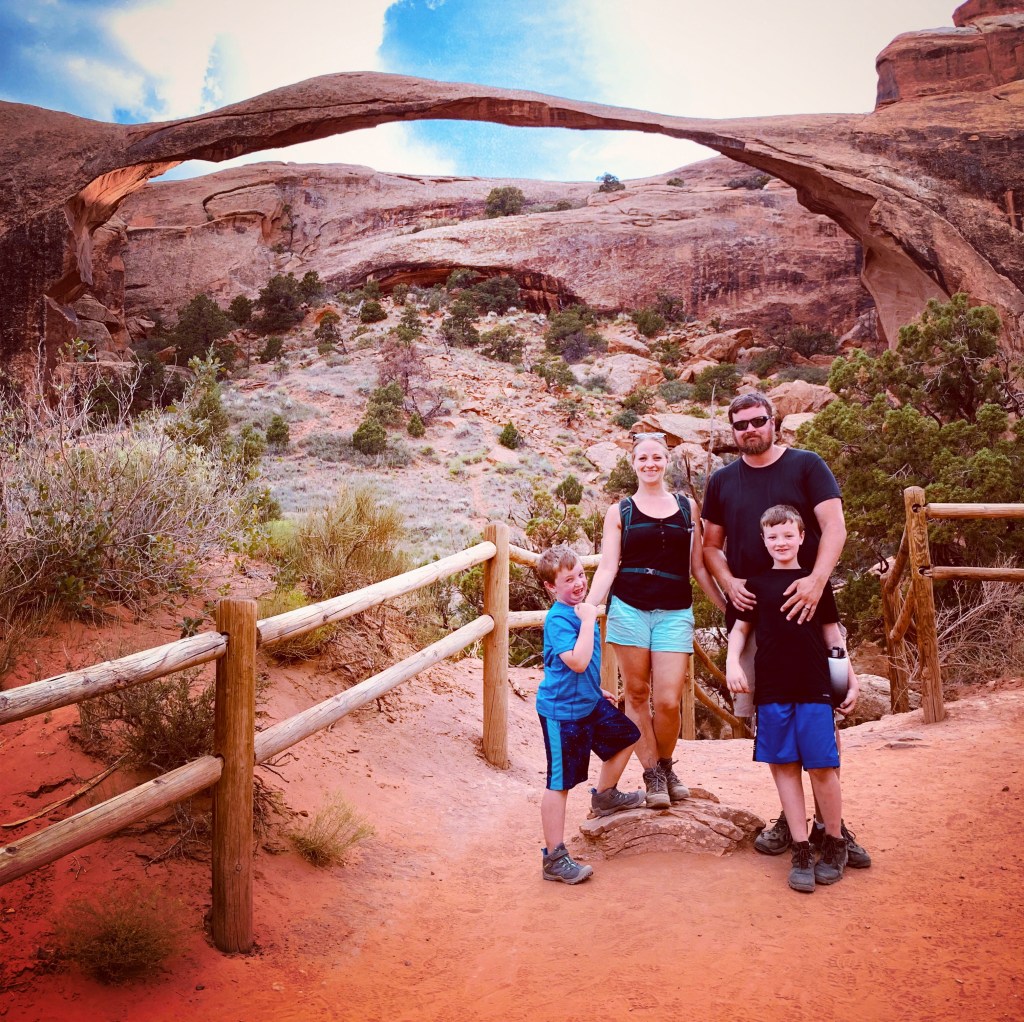
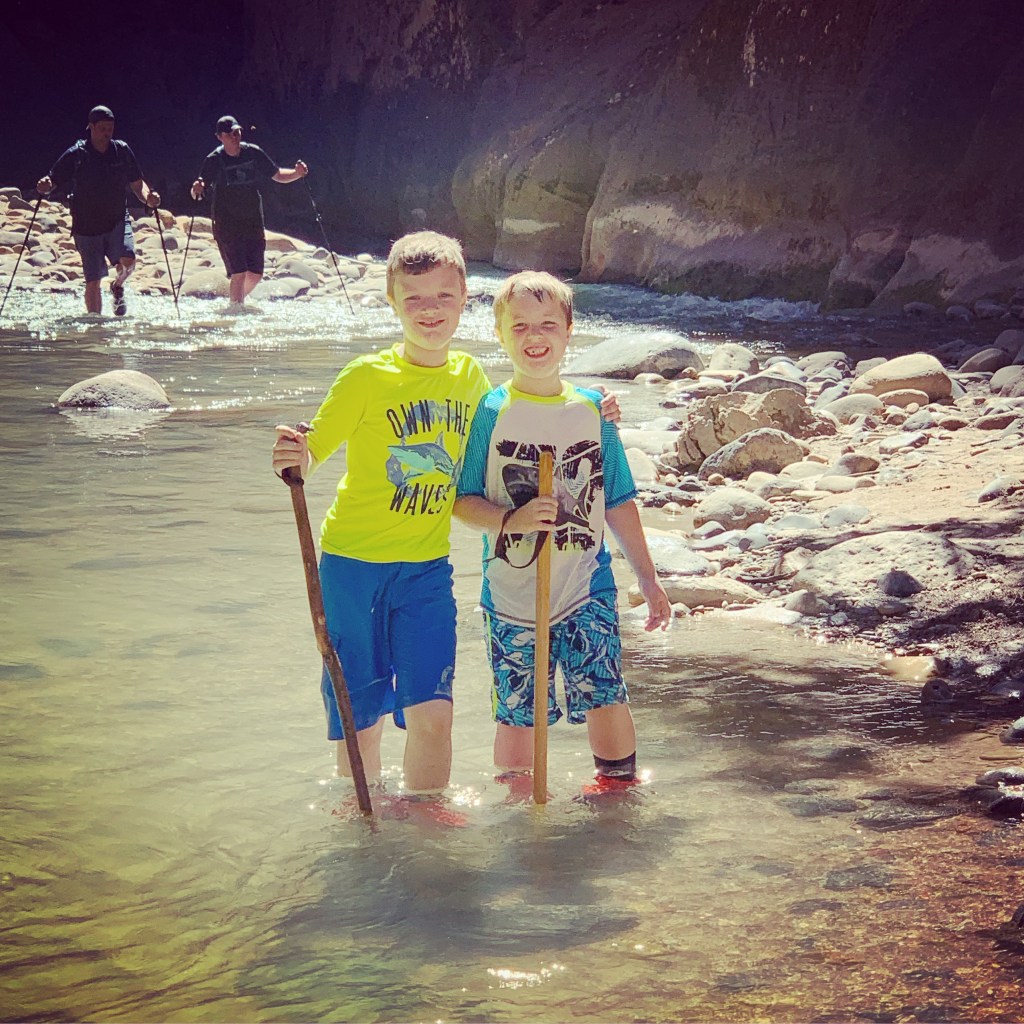
Hiking through a river can be challenging to begin with, but without the proper equipment it can be dangerous. Several outfitters in the nearby town of Springdale offer rental packages. The items and prices vary with the season, but we opted for the warm weather rental from Zion Outfitter for $25. This price included the sweet red canyon boots that the boys are wearing in the picture (they come in adult sizes, which look equally ridiculous), neoprene socks, and a hiking stick with a wrist strap. Many people try to hike the Narrows in bare feet or old sneakers, but that could easily turn into a sprained ankle. The canyon boots have a thick rubber bottom that grips the rocks and is designed for the purpose of hiking in water. They aren’t waterproof, so the water does get in and squish around as you hike. I guess this is all part of the fun though, right? At first, I didn’t think the walking sticks would be all that necessary, but after experiencing this hike, I wouldn’t go without one. They prevented so many falls and helped us keep our balance while navigating the rocks and currents. And Zion Outfitter allowed us to pick up the equipment the day before our hike without an extra fee, which helped us get an early start. I also suggest getting a waterproof case or pouch for your cell phone or camera. It allowed me to capture these photos without fear of dropping my phone into the river!

#2: Get there EARLY

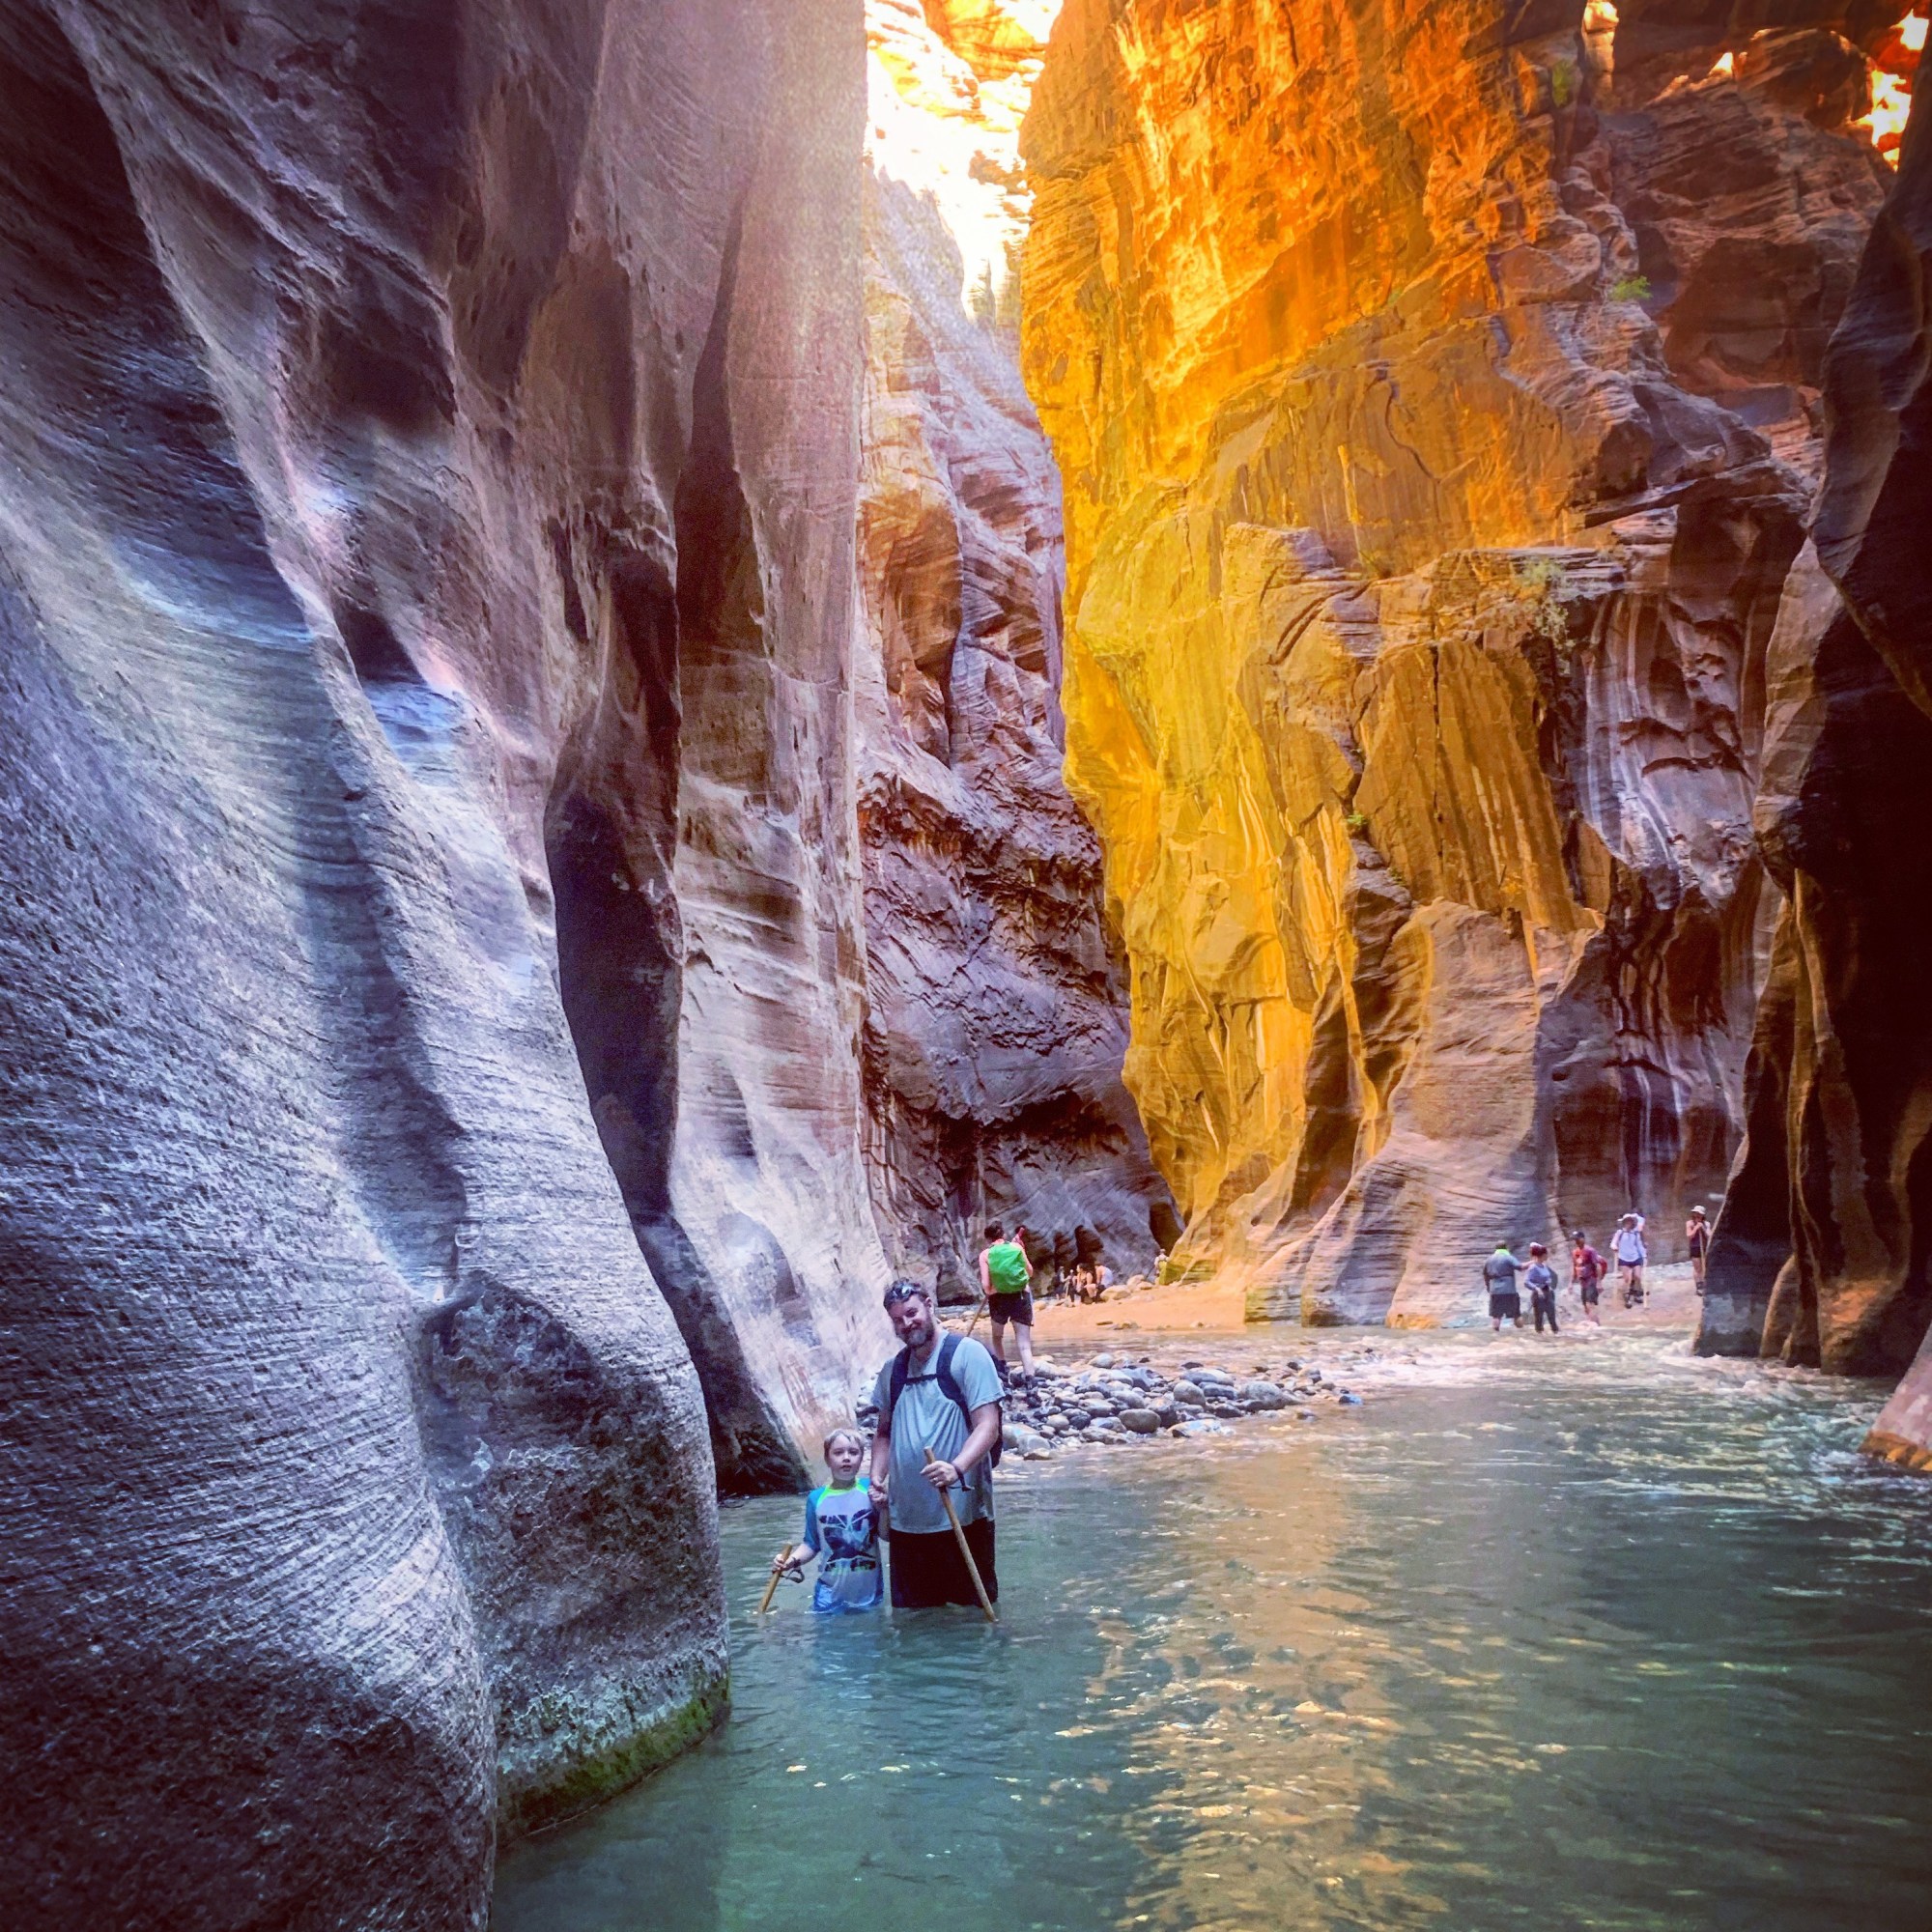
I can’t emphasize this point enough. The Narrows is absolutely beautiful, but it is one of the most popular locations in the park. Because the river isn’t wide, the space for hikers is limited. We woke up at 5:00am, quickly dressed, put on our crazy canyon boots, ate a quick breakfast and grabbed our supplies. We were lucky enough to be camping in the park, so we only had a short walk to the shuttle stop at the Visitors Center. The first shuttle leaves at 6:00am. I don’t think we made it for the first one, but we were close. The ride to the Temple of Sinawava stop was about 40 minutes so we arrived a little before 7:00am. The shuttle was pretty full, even at this time of the morning, but there is a one mile walk on a paved trail to get to the start of the Narrows. We entered the Virgin River at the same time as a handful of other families. After hiking for about an hour, there were no other people in sight. For about 4 of the 6 hours that we hiked, we saw very few people. However, as we were leaving the Narrows around 1:00, hikers were shoulder to shoulder coming in. We heard someone describe it as, “more crowded than Disney World.” I heard another person say, “Can you imagine how cool this would be if we were the only ones here?!” You can! It’s possible to experience the Narrows as a quiet, solitary hike if you’re willing to lose a little sleep.

#3: Take it slow

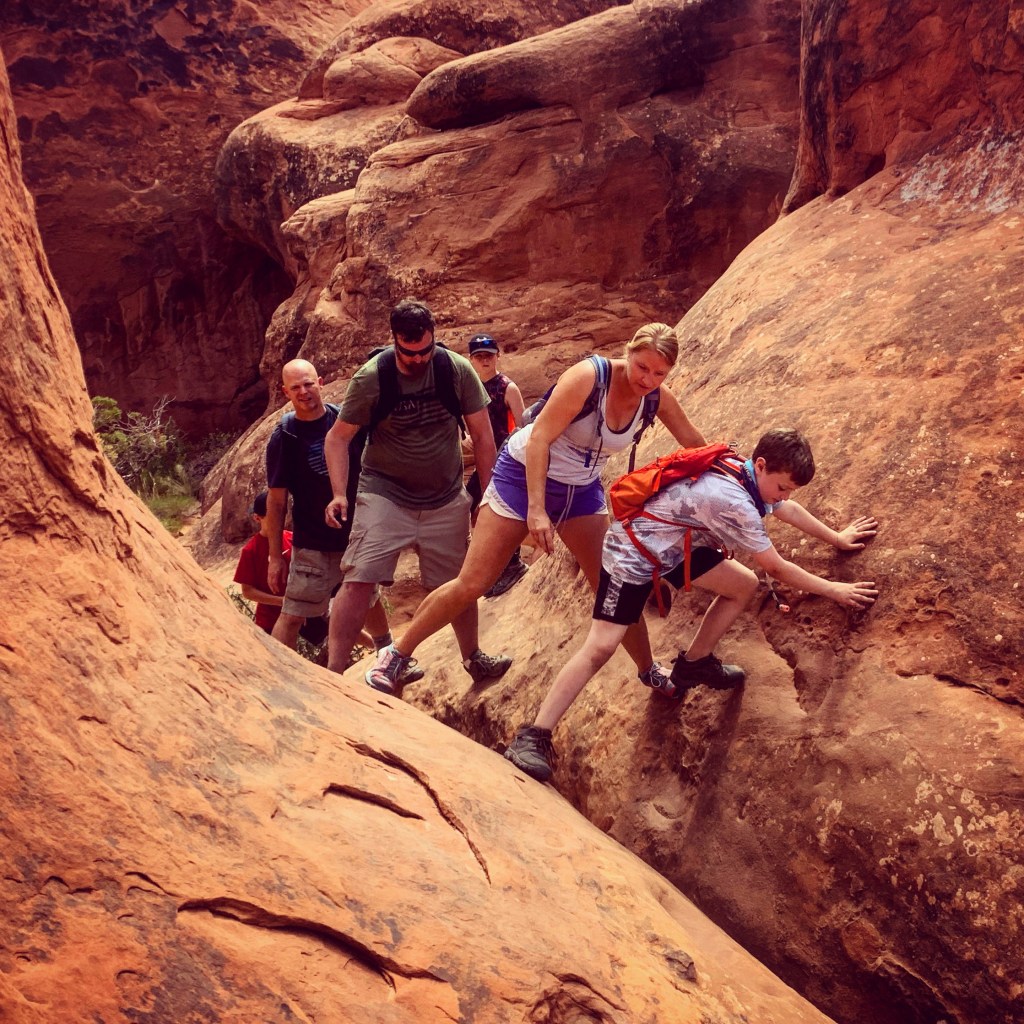
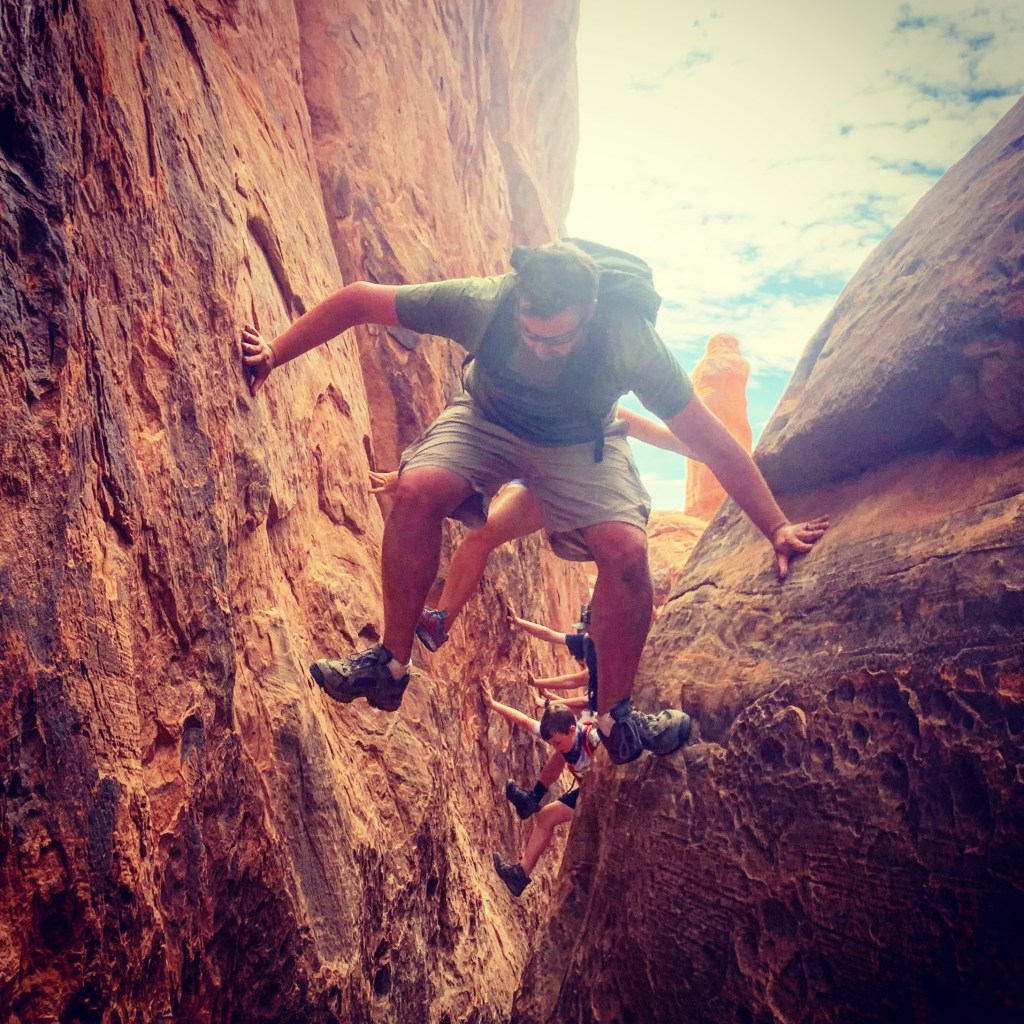
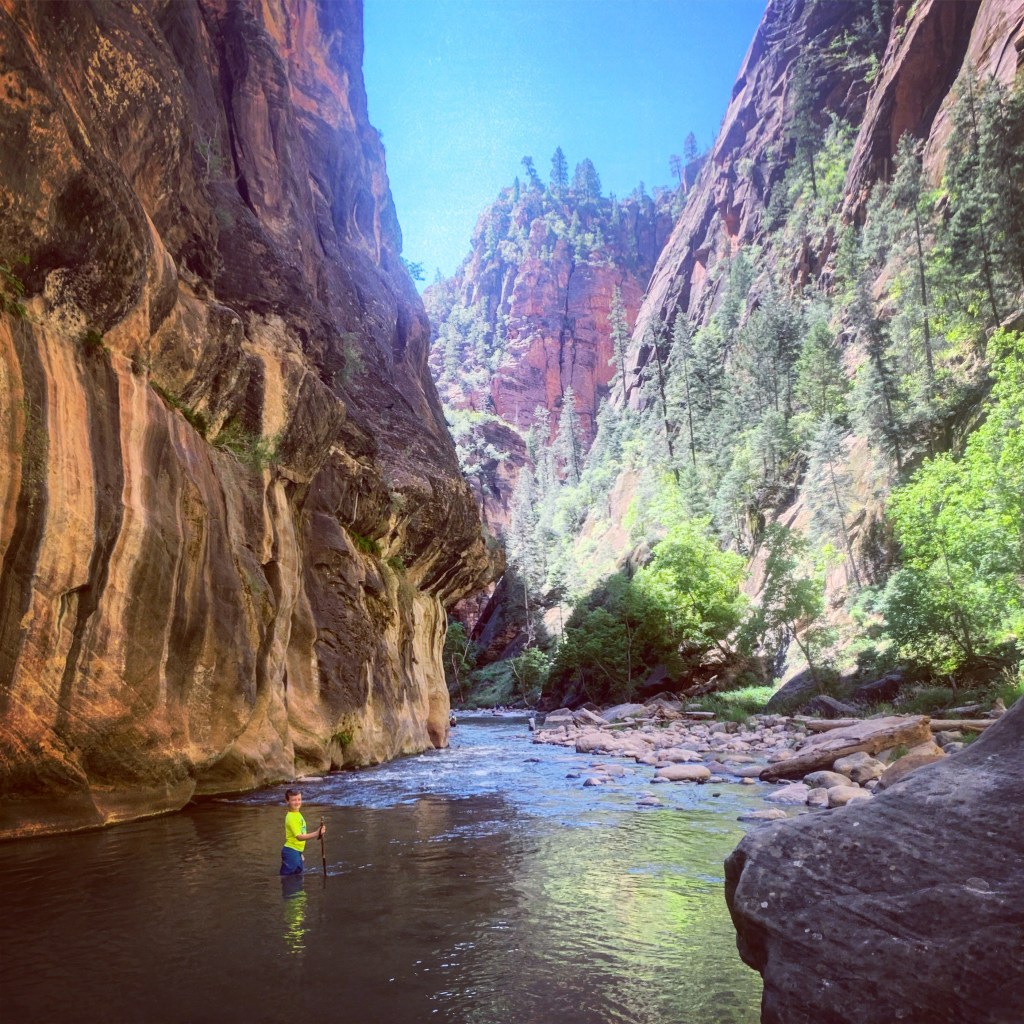
This is a hike that is definitely more about the journey than the destination. To hike the entire Narrows is around ten miles round trip. Very few people set out to complete that, partly because walking in water isn’t easy and partly because there’s no need to hike that far to experience the beauty of the gorge. Along the way are walls of rocks, little waterfalls streaming down, boulders to climb, patches of earth to take a rest on, and chest high water to swim in. I suggest you take it slow and steady, be cautious to prevent injuries, and enjoy the natural surroundings.

#4: Hike as far as possible

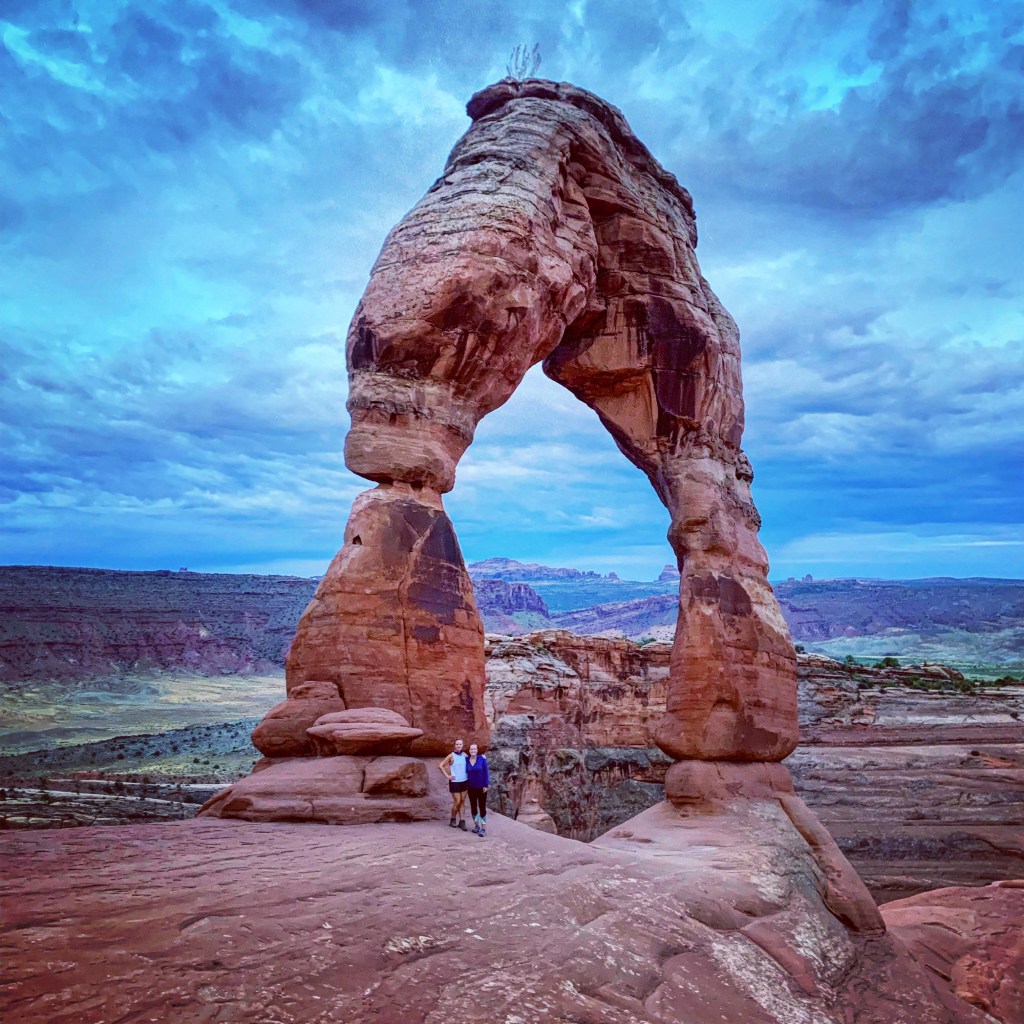
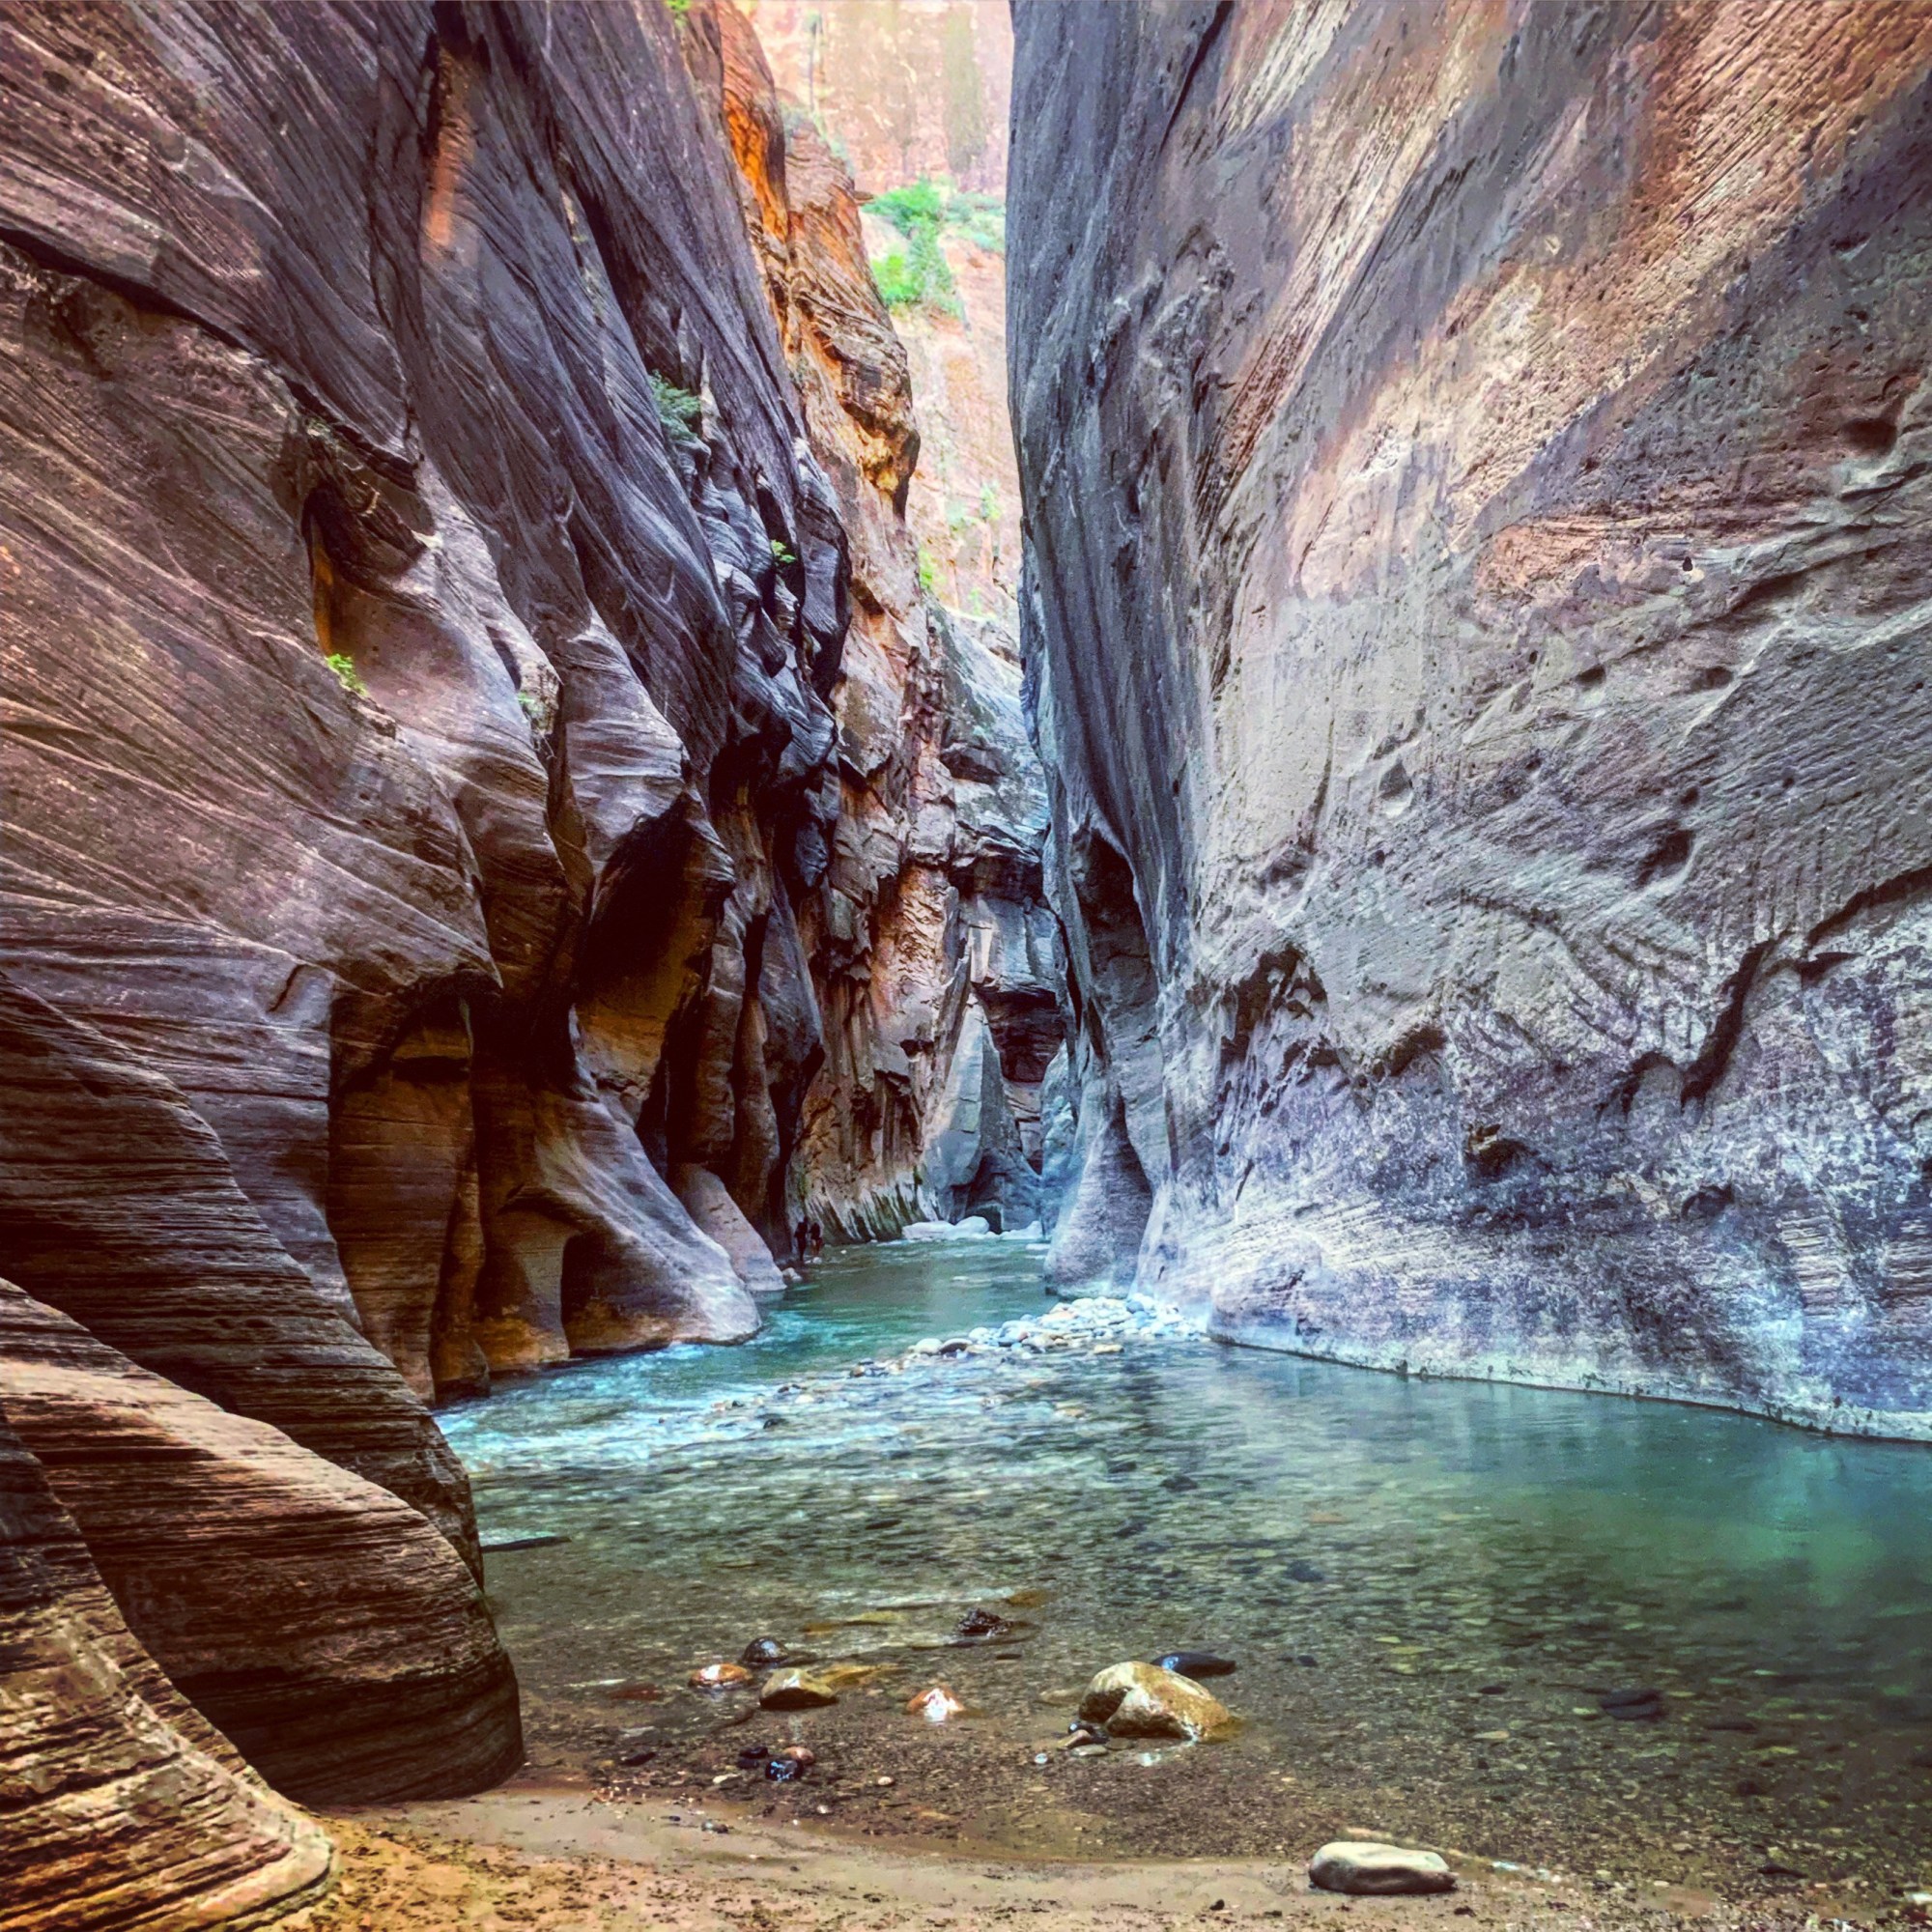
The further you go, the fewer people you see. But also, the canyon becomes even more narrow. Very little sunlight can reach the bottom unless the sun is directly overheard, and the canyon walls take on some beautiful curves. It took us about three hours to reach the most narrow point, and I have to give props to my boys because we didn’t see any other children this far in. They were troopers, and they were rewarded with an unforgettable hike!

#5: Soak it all in

I’ve completed many hikes in my day, but the Narrows is a special experience. There’s something about hiking in the cool water, surrounded by rock walls that have been there for millennia, listening to the birds, and eventually feeling the warm rays of the sun that awakens all of the senses. As I mentioned before, this hike is about the journey. It’s difficult to walk quickly in water, and there’s no reason to rush. There’s really no destination to seek or goal to achieve. This allowed us to slow down and soak in the experience, and I just kept thinking about how grateful I was to be there with my family.

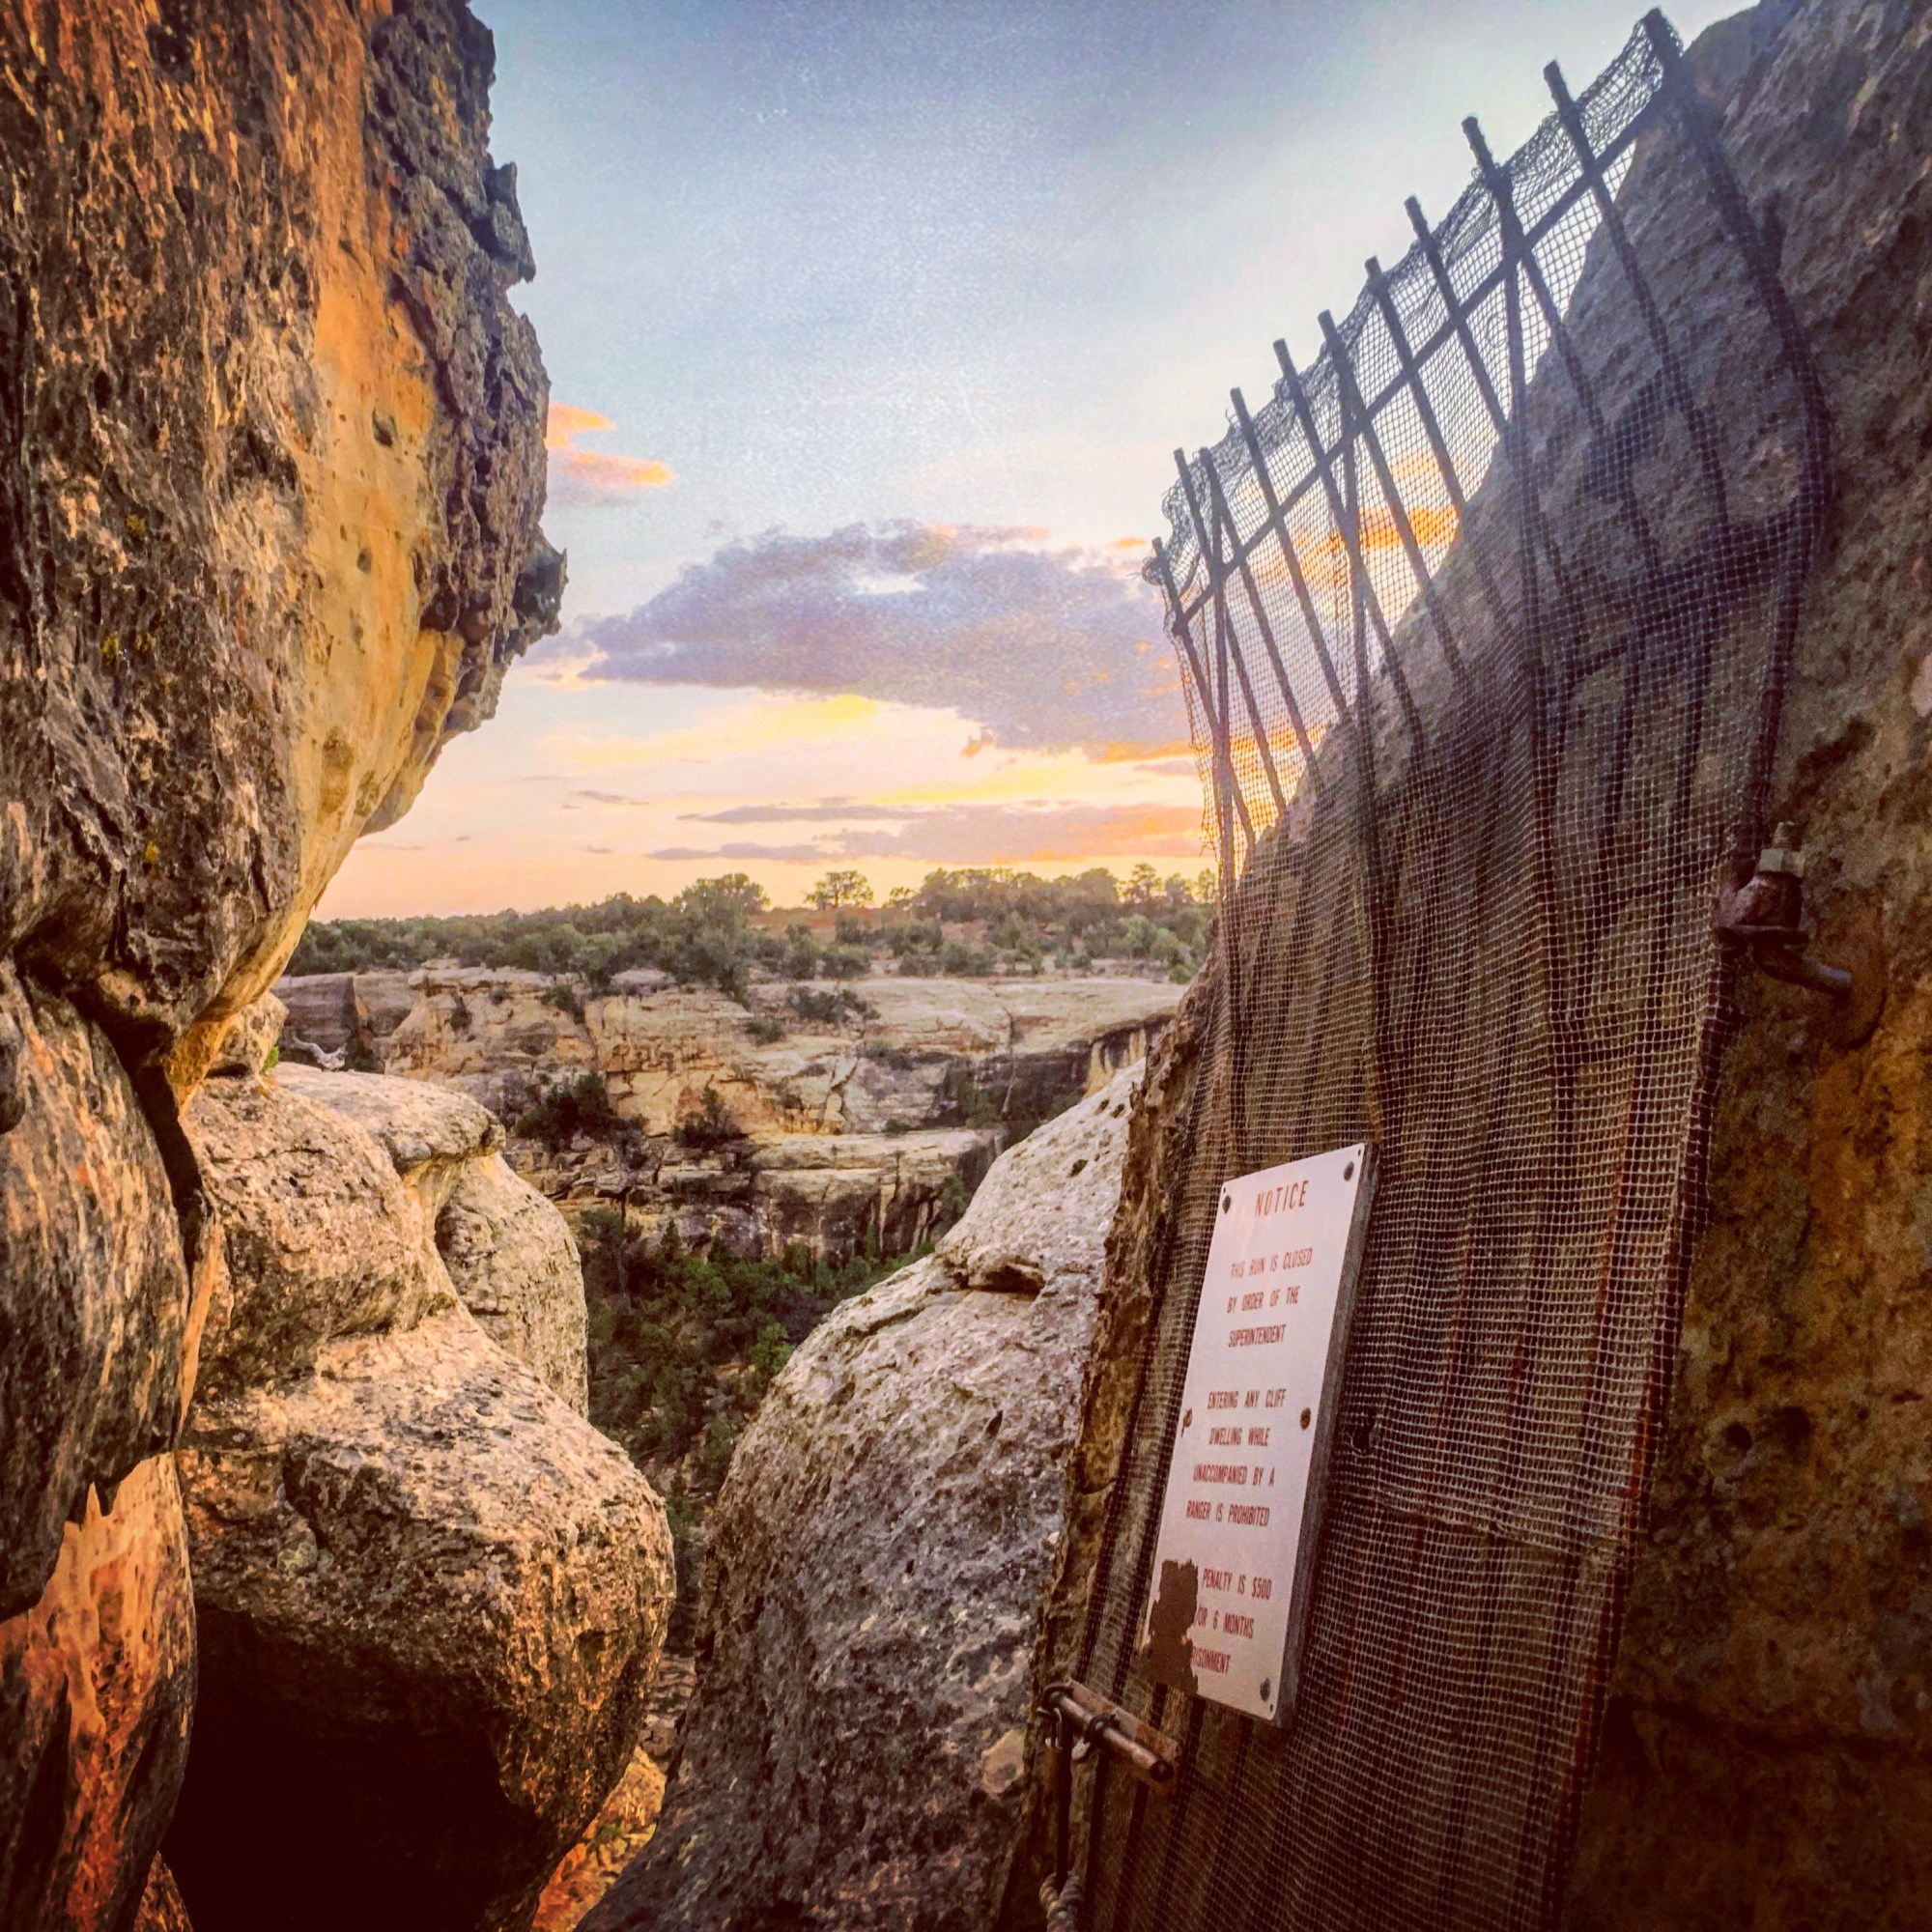
Hiking the Narrows was another check off on my bucket list, and it completely lived up to my expectations. Hopefully these tips will help someone else to have a good experience! And this definitely won’t our last trip to Zion National Park. If you know anything about Zion, you might be wondering how we skipped the Bright Angel Trail. (Look it up if you haven’t heard of it!). We decided the boys, especially Liam, were a little too young to navigate the steep drop-offs and chains. So I’ll be back to complete that some day, most likely with my daredevil Jack at my side!

Bryce Canyon National Park

Another day, another beautiful Utah park! Bryce Canyon National Park is famous for hoodoos, the tall, weathered rocks that cover the landscape. It is the largest concentration of hoodoos found on the planet, and they make for some beautiful photos! Because the campgrounds in the park weren’t taking reservations this summer, we stayed at Ruby’s Inn and Campground just a few miles outside the entrance to Bryce. I’m not a huge fan of private campgrounds to begin with, but Ruby’s was an unforgettably bad one. However, the proximity to Bryce Canyon was great, and we spent a full day hanging out in the hoodoos. Here are the highlights of our time there:

Mossy Cave Hike

We started our day with this short, fun little hike. The hike begins along Route 12, rather than inside the park. It’s less than a mile, but goes past a muddy river, up a hill, and then branches. The path to the left goes up to Mossy Cave, a cavern with water dripping and plants growing. The trail to the right gives views of a waterfall. Along the trail, hoodoos are visible. We opted to do this with a ranger guiding the way, so we were able to learn about the history of the area and the geology of the park. I wouldn’t prioritize this hike, but it’s especially good for preschoolers since it’s very short with plenty to see.

Queens Garden to Navajo Loop Trail

After our short hike to Mossy Cave, we headed in through the main entrance and parked at Sunrise Point. Looking down at the canyon from the rim is beautiful, but hiking down in and walking among the unique geological features is definitely a memorable experience. The Queens Garden to Navajo Loop is a 2.6 mile hike that combines two popular trails and can be done in either direction. We chose to enter the canyon on the Queens Garden trail, which begins at Sunrise Point. This is considered the least strenuous trail because it descends more gradually than other options. If you’re worried about hiking at elevation (or just generally hate climbing uphill), I would recommend doing this hike in the opposite direction. Start on the Navajo Loop side of the trail to avoid climbing up the steep switchbacks at the end of the hike. No matter where you begin, the trail will take you down 580 feet and allow you to walk among the hoodoos. We stopped at Queens Garden, Two Bridges, and Thor’s Hammer along the way before hiking out of the canyon on the Navajo Loop trail, ending at Sunset Point. This is an excellent family hike, but be sure to bring lots of water and take breaks on those crazy switchbacks as needed! The photos below show some of the views from the trail.

Scenic Drive

If climbing up and down steep trails isn’t your idea of a good time, there’s still plenty to see at Bryce Canyon! The sweeping views from the canyon rim are amazing and can be seen from the various stops along the 36 mile (round trip) scenic drive. After our morning hikes, we stopped at the picnic area near Sunrise Point to refuel then headed out on the scenic drive. We drove the entire length, stopping at most of the overlooks. Some of the stops on the drive have a short, paved trail to get to the scenic view. Our favorite stops (not counting Sunrise and Sunset Points) were Natural Bridge, Rainbow Point, and Inspiration Point. It started to rain on the way back, and there were storm clouds in many of our pictures. By the time we got back to the Visitor Center it was a full downpour. I’m glad we got our hikes in early!

We had a busy day exploring Bryce Canyon. The scenic drive was beautiful, but hiking the canyon was my favorite part of the day. It seems that the National Park Service agrees, and they had an initiative going on called the “Hike the Hoodoos!” Challenge. Nine benchmarks had been set up along trails on the park, and a small prize was given if you have a photo with at least three of them. Looking for the benchmarks gave the boys a little more motivation and they loved the vinyl stickers they received for completing the challenge. Such a fun idea to get people out of the car and exploring the park!

Arches National Park

When Ryan and I went on our first cross country summer road trip back in 2009, we didn’t make it to Arches National Park. I’ve always wanted to visit, and the awe inspiring pictures that pop up on daily on my Instagram feed have only added to that desire. And this stop was even more special because it was when my sister Ashley joined us! She drove from San Diego to spend 10 days of our trip with us, and we were beyond excited to see a familiar face three weeks into the trip.

Arches is awesome right from entry into the park. There is an 18 mile scenic drive that starts just past the visitor center. There are several arches and amazing rock formations visible from the road. Pullouts along the way allow you to stop and enjoy the views. We camped at Devil’s Garden campground, the only campground located in the park. This may be my new favorite national park campground. We had a big spot in the back, surrounded by big rocks that we could climb up to watch the sunset. It was a quiet, magical place. We only spent two nights, but our days were full of exploration. These were our favorite activities:

Fiery Furnace Hike

The Fiery Furnace is an area of the park with a maze of tall, sandstone fins. In order to enter this section of the park, you must either be guided by a ranger or obtain a permit from the Visitor Center. This is because there are no marked trails in the Fiery Furnace, and the ecosystem is extremely fragile. We purchased tickets ($8 per person) for the ranger-led tour, and it turned out to be one of the most memorable hikes of the summer. Because of the nature of the terrain, there were times that we had to squeeze through small openings, jump across gaps in the rocks, and spider climb to make our way through.

Ranger Kat led our tour, and she was fantastic! She focused on creating an experience that used all of the senses. We had the opportunity to smell naturally growing sage and taste lemonberries (they taste like warheads!). A portion of the hike was done in silence so that we could appreciate the sounds of the area. There were several “dead ends” that we ventured down, each with something interesting. One stop had a small hole with a black widow spider inside. Another had a small cave for us to crawl through. At the very end we were shocked to look up and see that we were directly under an arch, aptly named Surprise Arch. There were some sections of the hike that were a little challenging for Liam, especially since he’s so cautious, but most people in reasonably good shape could navigate this course. This was different from any of the other hikes in the park because we were walking among these awesomely big and beautiful geologic features, rather than admiring them from a distance. Definitely worth the time and money!

Sunrise Hike to Delicate Arch

Delicate Arch at dawn

I like to focus on the things I love about each of the locations we visit, but if I had one complaint about Utah in July is that it is HOT. Really, really hot. It was well over 100 degrees each day that we spent in Arches, and there is very little shade. Although its dry heat, unlike what we’re used to in the northeast, the heat can still be extremely dangerous. The whole family would have like to hike up to see the iconic Delicate Arch, but it was just too hot during the day for the family to make the 3.2 mile strenuous hike. We stopped at the lookout, but the arch was so far away that Ashley and I agreed we couldn’t leave Arches without an up-close encounter with Delicate Arch.

On our final morning, we woke up before the sun, and made the short drive to the trailhead. There were already quite a few cars in the parking lot when we arrived just after 5am. We hit the trail with our flashlights guiding the path. It was pretty much straight up a steep section of exposed rock. There was some signage, but it was easy to lose the trail in some locations. Just as we got to the top, the sun was coming up. Because it was a cloudy morning, we didn’t get a colorful sunrise, but it was still magical in its own way, with the sky taking on some beautiful shades of blue. We stayed for a bit to enjoy the moment, then booked it back down the hill, stopping only to check out a scorpion (so cool!) and the petroglyphs near the start of the trail. We made it back before the boys even woke up. This predawn hike was a special experience to share with my sister!

Devil’s Garden Trail

On our first evening in the park, we wanted to get out and see some arches, and Devil’s Garden Trail was the perfect after-dinner hike. At just under two miles round trip, this hike took us to three very different arches. This highlight of the trail is Landscape Arch, the longest arch in the park at 306 feet. The trail was nice and easy, perfect for families with small children or people who just want a leisurely walk. Along the way, there is a short turn off for Tunnel Arch and Pine Tree Arch. Tunnel Arch is exactly what it sounds like – a tunnel through the rocks. Pine Tree Arch took us right up close to a big arch (with some pine trees nearby, hence the name). We were actually able to walk along the rocks that made up the bottom of this arch. What I really liked about this walk was that we got to see three very different arches without expending too much energy (and in this weather, sweat!).

Side Trip to Canyonlands

Okay, I mentioned the heat. It was so hot that after finishing our Fiery Furnace hike, a nice drive with air conditioning sounded amazing. We decided to drive the hour to Canyonlands National Park, and it made for a great afternoon. We made a quick stop at the visitor center so the boys could pick up Junior Ranger books, and we watched the park film. We enjoyed some of the beautiful views of the canyon right outside and then headed out on the scenic drive. We made several stops at various lookouts along the way, but the highlight was the Grand Viewpoint. We could see storms in the distance while looking out at the canyon, but it was sunny where we were. We drove to Upheaval Dome, a giant crater in the earth, and hiked up to the first viewpoint. Although it wasn’t far from Arches, the landscape was very different and well worth the drive.

We had a wonderful stay in Arches National Park. The formations and natural beauty left a lasting impression. The ability to get up close to these iconic arches and appreciate the unique characteristics of each one made the experience even more special. It’s hard to talk favorites because each national park is protected for a reason, but if I had to choose just one Utah park to visit, Arches would be the winner!

Mesa Verde National Park

View of Spruce Tree House

Most of the national parks that we visit have a focus on preserving the natural beauty of the area – mountains, lakes, rock formations. Mesa Verde National Park is different. Located in the southwestern corner of Colorado, it was a created to protect and preserve the archeological remains of the Ancestral Puebloans who built their homes and villages in the cliffs of the mesa from 600 to 1300 CE. There are over 5,000 archeological sites within the park, including more than 600 cliff dwellings. Many are remarkable well preserved considering that they are between 700 and 1400 years old! The history buffs in our family were eager to get out and explore all that this park had to offer. We spent an entire day, from early morning until after sundown, out on the mesa visiting the sites. These are our favorites!

Scenic Drive through History

There are several areas of the park that can be accessed without a guided tour, and most are just a short walk from the paved roads of the park. We started our day by driving from Morefield Campground, stopping at the Montezuma Valley overlook and the Park Point overlook for sweeping viewing of the surrounding area. From there we headed to the Far View Sites, where the remains of 50 villages can be found within a half mile of each other. There is a trail system that connects the sites, and a guidebook is available that describes exactly what you’re looking at. Some of the remains are well preserved, while others are just the remnants of a foundation in the ground. It’s best to explore this site first because it would have been far less impressive after viewing the expansive and well-preserved cliff dwellings.

Our next stop was the Chapin Mesa Archeological Museum. This doubles as a visitor center, with park rangers on hand to answer questions. There is a 20 minute film about the history of the area and the people who called it home. This provided a lot of necessary context, especially for the boys, so I would strongly recommend it. The museum has dioramas and exhibits of artifacts that had been recovered during the excavation of the sites. It was interesting to see the pottery, footwear, utensils, and art from that time period. Out the back of the museum is a trail to Spruce Tree House, a large and well-preserved cliff dwelling. While we were there the trail was closed due to recent rock falls, but there are nice views of it from the area outside the museum. This area also has a cafe, gift shop, picnic area, and restrooms. We had lunch in the picnic area before continuing our drive onto the Mesa Top Loop. This is a 6 mile loop, with 12 stops. Each has a short, paved walking path to the site. There is a guide brochure that describes the history and archeology of each of the stops. Some were more interesting than others. Highlights from the Mesa Top loop include views of Cliff Palace from above, the grand Sun Temple, and Square House. It took us about 90 minutes to complete the loop, stopping at all 12 sites along the way. There is a lot of history to experience on the drive, so it’s a great option for those who are unable to do the more physical cave dwelling tours.

Balcony House Tour

This cave dwelling tour allows you to enter into Balcony House, a thirteenth century structure with over 40 rooms. It’s considered to be an adventure tour because it requires participants to climb a 32 foot ladder, scramble through an 10 foot long, 18 inch wide tunnel, and walk along the edge of a cliff. There is a replica of the tunnel in the visitor center for people who want to try it out before booking the tour. Ryan is a big guy and had to go through sideways, but he fit without any issues. The tour starts on a path that descends 100 feet along the cliff edge. This leads to the big ladder. It was nerve wracking to climb, but I was more focused on Liam than myself. Not looking down helps a lot. Once everyone in the group was up the ladder, the tour guide provided information about the rooms and structures we could see. The wooden pegs for the balcony were still standing over 800 years after being placed! The views of the surrounding area were beautiful from the dwelling. Once the ranger had answered everyone’s questions, we squeezed through the tunnel which was the only entrance to the dwelling when the Ancestral Puebloans lived there. Then it was up several more ladders and stone steps to get back to the top. This was a great tour to get the adrenaline flowing while also experiencing history!

Cliff Palace Sunset Tour

The National Park Service offers guided tours of three cliff dwellings: Balcony House, Cliff Palace, and Long House. In order to attend a guided tour, tickets need to be purchased in person at the Visitor Center (or a few other locations in and around the park). For people passing through the area, especially during the busy summer season, it can be difficult to get same-day tickets. One of the only tours that can be reserved in advance is the Cliff Palace Sunset Tour. The tour is more expensive than the standard one, but its longer and the group is smaller. And we hit the ranger lottery when David Nighteagle, a Native American from the Lakota tribe and a long time national park ranger, was assigned to guide our tour.

The tour began with a short walk down from the top of the mesa along a path. We sat along the rocks and heard about some of the history of the area. Ranger Nighteagle focuses on having people on his tours connect to the location on an emotional level, so we spent some quiet time enjoying the sunset and views of Cliff Palace before making our way to the cliff dwelling. Cliff Palace contains over 150 rooms and is thought to have been a place of significance to the Native Americans who lived here. Because of the number of rooms and kivas, it may have had administrative or ceremonial purposes. We were able to walk through the site, as the ranger shared information about the people who lived here and answered questions. We sat on a windowsill to view original artwork on the ceiling of one of the rooms, and as the sun began to set, Ranger Nighteagle took out a handmade flute and played a song of thanks to the spirits. It was both eerie and beautiful. Leaving the site required climbing up several ladders and stone steps. We came out just as the sun was dropping below the horizon.

This is truly a special site, containing archeological evidence to a past that we know little about. Seeing the sites on these cliff ledges where thousands of Native Americans made their homes gave us a tiny glimpse into what life may have been like for them – their priorities, struggles, and fears. We learned a lot, but also saw how many questions are left unanswered. Why did they suddenly leave these cliff dwellings that took years of hard work to create? What threatened their safety? The mysteries are as intriguing as the facts. And that is what makes this Jack’s new favorite national park!